Each year as Halloween approaches, many face the challenge of carving the perfect pumpkin, which often results in frustration and less-than-satisfactory results. Unclear patterns and difficult-to-use tools can leave your pumpkin looking like a spooky disaster rather than a festive masterpiece.
The solution to this common problem is simple: a step-by-step guide to carving your pumpkin. This guide, ‘The Ultimate Guide to Carving the Perfect Puking Pumpkin,’ presents an easy-to-follow process aided by tips and tricks that ensure a perfect carving every time.
Dive into the specifics of this guide to discover the art of carving a pumpkin that will be the envy of your neighborhood. Not only will you increase your carving skills, but you’ll also enjoy a fun and festive activity that can become a beloved tradition.
What is the Perfect Pumpkin?
While choosing and carving the pumpkin are essential, the decoration aspect is equally critical in creating the perfect pumpkin. A little bit of food coloring can turn your pumpkin into an eye-catching masterpiece. From a cute pumpkin with freckles to a barfing pumpkin for a touch of humor, you only need a little creativity.
Social media app logos, sweet sayings, and scary movie inspirations can all be great design ideas. If you’re a cat lover, a black cat pumpkin or a cute cat pumpkin design can be an adorable addition to your front porch.
How to Choose The Right Pumpkin?
The first step towards carving the perfect puking pumpkin begins with selecting the right pumpkin. When choosing a pumpkin, there are several factors to consider. The size of the pumpkin is important – larger pumpkins can be easier to carve and provide a bigger canvas for detailed designs, while smaller ones can be perfect for simpler or smaller designs.
The shape of the pumpkin is another factor to consider, as it can inspire the design you choose. For example, a round pumpkin might be suited to a traditional Jack-O’Lantern face, while a taller, thinner pumpkin could be perfect for more elongated designs.
Examine the pumpkin carefully for any signs of damage or decay as these could affect its longevity. Smooth pumpkins are often easier to carve than ones with many bumps or ridges. The color of the pumpkin doesn’t just contribute to the aesthetics; it can also indicate its ripeness and durability. A uniformly orange pumpkin is usually ripe and ready for carving.
The pumpkin’s stem should not be overlooked. It should be strong and firmly attached, acting as a handle when you remove the top of the pumpkin. Avoid lifting the pumpkin by its stem, as it can break off easily.
Lastly, place the pumpkin on a flat surface to ensure it sits well and does not roll, important for the stability of your display.
Preparing the Pumpkin for Carving
After selecting your perfect pumpkin, the next step is preparing it for carving. Start by spreading paper towels or newspapers over your carving area to contain the mess. Then, using a sharp knife, carefully cut a circle around the pumpkin’s stem to create a lid. You’ll want to angle your knife towards the center of the pumpkin to ensure the lid doesn’t fall in.
Once the lid is removed, the great pumpkin gutting begins. This can be a slightly messy process, but it’s also a fun one, especially for children. Using a large spoon, scoop out the pumpkin seeds and the stringy flesh, also known as the ‘pumpkin guts’. Remember to save these for the fun science experiment mentioned earlier, or you can roast the seeds for a tasty snack.
Make sure you scrape the inside wall of the pumpkin where you intend to carve the design. Thin it out to about an inch to make the carving process easier.
Sketching your design out with a marker is suggested before you start carving it. There are many design options, from a simple toothy grin to a slightly more advanced design like a braces-wearing pumpkin or an intricate design like a botanical pattern. If you’re using a stencil, this is the time to tape it to your pumpkin and trace the design onto the surface.
Now that your pumpkin has been properly prepared, you can start carving! Just remember, safety first: always carve away from your body, and children should always have adult supervision. Happy pumpkin carving.
Cleaning and Prepping the Pumpkin
Cleaning and prepping your pumpkin is essential in carving your Halloween masterpiece. Start using a serrated knife to cut a large enough hole at the top of your pumpkin. This will allow you to easily scoop out the pumpkin guts using a craft knife or a simple spoon.
Remember to save those guts for later pumpkin experiments. You might be surprised by the amazing reactions a little baking soda and cups of vinegar can cause—a classic chemical reaction of carbon dioxide creation that led to a former eruption!
Once the inside is clean, wipe the exterior with paper towels to ensure a clean surface for your pumpkin design. If you’re aiming for an intricate design, use printable stencils such as skull stencils, or go freehand if you’re feeling adventurous.
Use food coloring or black spray paint on your pumpkin for a unique look. Whether you’re looking for a classic Jack-O’ lantern carving, a cute cat pumpkin, or a more advanced design like a beloved character (baby Yoda, anyone?), prepping your pumpkin properly is the first step to a successful carving experience. Don’t forget to use LED tea lights or battery-operated LED lights for a safe and long-lasting glow.
Marking Out Your Design on the Pumpkin
When you’ve chosen your perfect pumpkin and have a design in mind, the next step is marking out your design on the pumpkin. Many ideas are available, from the traditional Jack-O’Lantern to more intricate designs like cute cat pumpkins, eyeball pumpkins, or even your favorite social media app logo. Printable stencils can be a great help if you’re not confident in your freehand sketching skills.
For instance, skull stencils for scary designs handmade by Charlotte, Lady Face Blog, or Martha Stewart for sophisticated botanical patterns. You can use a pencil or a washable marker to trace your design onto the pumpkin. Remember, it doesn’t have to be perfect; the slight deviations can add a sense of humor or a slight twist to your pumpkin creation.
If you like popular characters, consider carving an adorable Baby Yoda or a classic Mickey Mouse. Whatever design you choose, marking it out carefully on your pumpkin will ensure the carving process is smooth and enjoyable.
Carving Out Your Design
Carving out your design is where your pumpkin truly starts to come alive. It’s also a perfect time to showcase your creativity and sense of humor, with designs ranging from a simple toothy grin to a more intricate skull or beloved character like Baby Yoda.
If you’re a fan of scary movies or social media, you could carve your pumpkin to mimic a scene or logo from your favorite media. If you’re a cat lover, you might consider creating a cute cat pumpkin design. For those who are more artistically inclined, painting skills can be used to create cool pumpkins with detailed, intricate designs like a magical cottage scene or a realistic pineapple.
For the carving process, you’ll need tools like a craft knife for detailed designs or a serrated knife for larger cuts. If you’re planning for a more intricate carving, a power drill might be helpful. Printable stencils can be a great aid, especially for beginners or those aiming for a more complex design. LED tea lights or battery-operated LED lights can be used to illuminate your pumpkin safely.
Remember, carving a pumpkin is about more than creating a Halloween decoration. It’s about the experience, the pumpkin experiments, and the memories made. So grab your tools, put on your favorite Halloween movie, and let your creativity shine.
Adding Finishing Touches to Your Pumpkin Creation
To add finishing touches to your pumpkin creation, implant LED tea lights. These are safer than traditional candles and provide a longer illumination period.
Crafting a Classic Jack-o’-lantern Carving
For a classic Jack-O’-Lantern carving, use a serrated knife as your tool of choice. Begin by sketching out the design – typically a toothy grin and triangular eyes – on the pumpkin using a marker. Then, slowly cut along the lines with the serrated knife to achieve the desired effect.
Creating a Spiky Jack-o’-lantern Design
If you’re looking to create a spiky Jack-O’-Lantern, follow the process as before but make the teeth of your grin pointed rather than square. Consider using printable stencils to help guide your design. The craft knife can be used for the finer details in this design as its precision outmatches that of the serrated knife.
Making a More Intricate, Detailed Design with Craft Knife and Serrated Knife
For those seeking a more intricate and detailed design, patience and creativity are key. Employ the craft knife for these designs as it allows for greater precision and the ability to create complex patterns. Don’t limit yourself to faces – botanical patterns, beloved characters from scary movies, or even your favorite social media app logo can be carved onto the pumpkin. Let your imagination run wild.

- Fall Decor Set: The Artgar 9 PCS artificial pumpkin set is perfect for enhancing your fall, Halloween, and Thanksgiving …
- Quality Materials: Each pumpkin is crafted from premium polystyrene foam, ensuring they are lightweight and sturdy. The …
- DIY Creation: Artgar fake pumpkins are for DIY looking to create unique and personalized decorations. Whether it’s craft…
Remember, the perfect time to showcase your pumpkin is at dusk when the glow from the LED light inside will radiate outwards, displaying your design in all its radiant glory. Whether you opt for a simple or intricate design, the end goal is to enjoy the process and create a pumpkin that reflects your unique style and sense of humor.
Experimenting with Food Coloring and Carbon Dioxide Reactions
For those who want to add a touch of science to their Halloween festivities, experimenting with food coloring and carbon dioxide reactions can be a fun and educational project. Start by carving out your pumpkin and then mix a cup of baking soda with some food coloring of your choice inside it. The pumpkin guts can be set aside to be utilized later. Once your baking soda mixture is ready, add a few cups of vinegar to initiate the chemical reaction.
The combination of baking soda and vinegar will create a cool ‘Foamer Eruption,’ a classic example of an acid-base reaction. The mixture will release carbon dioxide gas, causing a colorful and dramatic overflow that is sure to impress. Always ensure that paper towels are handy to clean up any mess quickly.
This twist on pumpkin carving not only results in cool pumpkins but is also a fantastic way to introduce kids to basic chemistry concepts such as chemical reactions and the release of gases. Make sure to document your pumpkin experiments and share your amazing reactions on your social media platforms—your pumpkin merit is sure to pique the curiosity and admiration of your friends and family.
Remember to use battery-operated LED tea lights to illuminate your carved creations. The lights will provide a mysterious flicker, enhancing the visual spectacle of your carved pumpkin and the vibrant colors of your food coloring experiment. In the spirit of Halloween, have fun and embrace the unexpected with this unique carving idea.
Safety Tips for Carving Pumpkins
Safety is paramount when it comes to carving your perfect pumpkin. Always supervise children during the carving process and consider letting them scoop out the pumpkin guts and draw the design while an adult does the actual carving.
When using a craft knife or a serrated knife, always cut away from your body and take your time. Never rush the carving process as this increases the risk of accidents. Use a stable, non-slip surface for your carving station to prevent the pumpkin from sliding around.
Fun Ideas for Decorating With Faux Pumpkins
Faux pumpkins offer a versatile and mess-free alternative to real pumpkins, and they can be used year after year. If you’re a fan of adorable pumpkin designs, consider carving a cute cat pumpkin or an eyeball pumpkin for a fun twist. For Disney enthusiasts, a Mickey Mouse or Baby Yoda design will surely prove a hit.

- Eeriescary Jack-O’-Lantern: Add a new dimension to your Halloween festivities with this animated plush soft toy pumpkin….
- Easy to Use, Battery Operated: Simply tap Eeriescary Jack-o’-Lantern on his forehead to start and stop him playing. The …
- Halloween decoration with a spooky story: Amuse children, trick-or-treaters, or your party guests with this pumpkin’s un…
You could also take inspiration from the magical cottage scene designs from the handmade Charlotte or Ladyface blog. If you’re a social media enthusiast, why not carve your favorite social media app logo into a pumpkin?
Unleash your painting skills on faux pumpkins using food coloring for a vibrant effect. A trend that’s making the rounds on social media is transforming faux pumpkins into realistic pineapples or a row of fencing featuring beloved characters. For the cat lover, create a black cat pumpkin, and for those with a sense of humor, a braces-wearing pumpkin or barfing pumpkin will provide the laughs.
If carving is not your forte, printable stencils like skull stencils can guide your pumpkin design. You can choose from simple designs to more intricate ones. You could also use a power drill for detailed design. For a slight twist, you can experiment with botanical patterns on your faux pumpkin.
LED tea lights or battery-operated LED lights are perfect for illuminating your faux pumpkins, creating an ethereal glow similar to the northern lights. Lastly, for a spooktacular finish, add a black spray print or an orange smoking canister to your pumpkin display. Remember, decorating faux pumpkins is all about personal creativity and fun.
Conclusion
In conclusion, carving the perfect puking pumpkin is a fun-filled and exciting endeavor that calls for creativity, patience, and a sense of humor.
Whether you’re working with a real pumpkin or a faux one, the goal is to enjoy the process, explore a variety of designs, and create a unique masterpiece that reflects your personal style. With the right preparation, safe carving techniques, and imaginative decoration ideas, you can create a pumpkin that stands out and adds to the festive spirit of Halloween.
Whether you’re carving a classic Jack-O’-Lantern, experimenting with food coloring and carbon dioxide reactions, or creating a stunning display with faux pumpkins, remember to illuminate your creations with LED tea lights for a spooky and enchanting effect. Happy carving!

- 🎃Package Include: 2PCS Pumpkin Lamp. Hollow out skull pumpkin lantern glowing in the dark are scary.
- 🎃Material: Pumpkin light are made of high quality PVC plastic with light (not included Batteries) . Safe, Environmental …
- 🎃Size: 5.12 in x 4.92 in. It is being a lovely embellishment to Halloween and fall festivals.
FAQ about Awesome Puking Pumpkin
How Do You Make a Puking Pumpkin That’s the Star of Halloween?
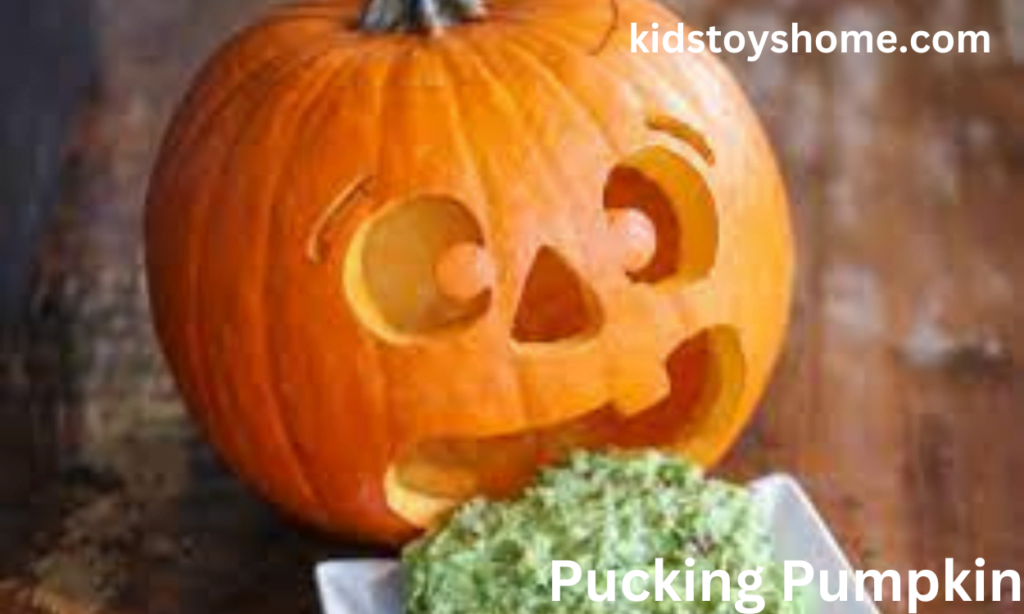
Carve a pumpkin face, add guacamole, candy, or baking soda for dramatic effects, and let it “throw up” hilariously for laughs and spookiness!
Can You Use a Stencil for a Puking Pumpkin?
Yes! Stencils make carving easier. Choose a funny or gross expression for your puking pumpkin and watch it steal the show.
What’s the Trick to a Baking Soda Puking Pumpkin?
Add baking soda and vinegar inside your pumpkin for a foamy, dramatic puking effect—science meets spooky fun!
What’s the Best Food for a Puking Pumpkin?
Guacamole is a classic choice, but you can also use candy or dip to turn your pumpkin into a grossly delicious centerpiece!
Need Puking Pumpkin Carving Ideas?
Get creative with exaggerated expressions—wide eyes and a gaping mouth make the perfect puking look. Add props for extra flair!